
Test of Zwave.me KFOB2 remote control
The remote keychain KFOB from Zwave.me using Zwave protocol have been updated to version 2 (KFOB2) to fix some bugs and improve battery life. I had one to do some tests (thank you Domadoo).
There are already several tests about this KFOB(2), particularly in French at ma maison domotique, fan2mobiles.org, domadoo … But I lacked information on several points: the proximity control mode, compatibility with Fibaro modules in this mode, the real range of the device, battery lifetime.
Here is a summary of this post :
- Short Presentation
- Mechanical and electronic design
- Pairing and Configuration
- Proximity control mode
- Compatibility with Fibaro modules
- Remote range
- Battery lifetime
- Conclusion
Short Presentation
The remote comes in a small box containing the key and the single sheet manual in English. The latter includes the information available on the Z-wave.me website. The battery is mounted by default, the remote is functional upon receipt.
The exterior design of KFOB is friendly with a mixture of steel and plastic. Its steel contour gives a good solid feel to it that is, I think, quite justified.
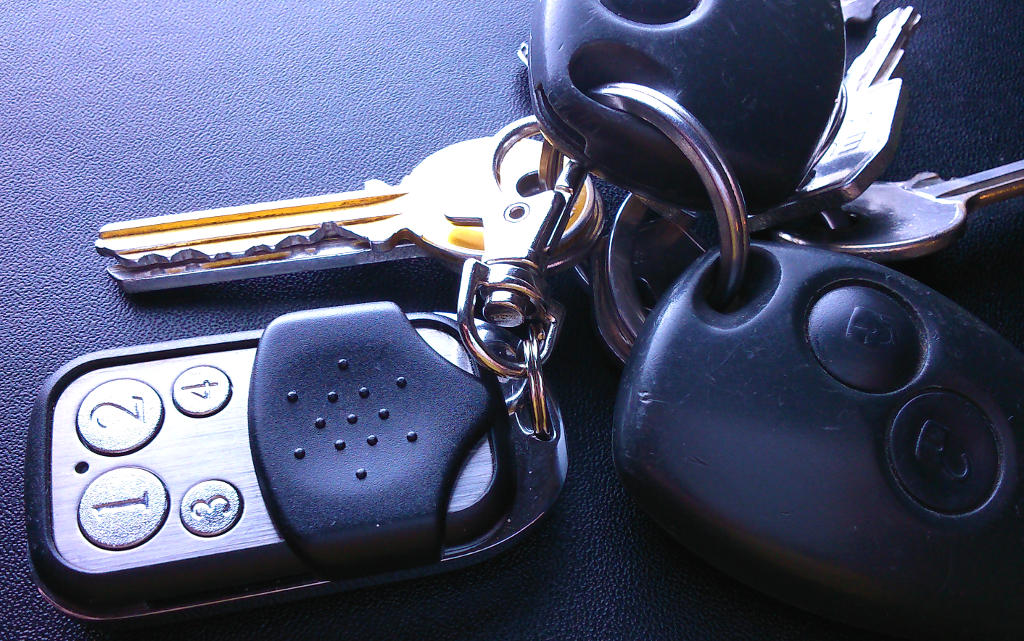
The downside of using steel : weight is a little high once hung with other keys . If I compare to a basic car key this is a few more grams. Its size is perfect : big enough for a fairly easy access to buttons, compact enough to fit on a keychain .
A door protects the buttons , very good point. The hard point to lock it in closed position is not hard enough : the door shall remain slightly open showing half of the 1 and 2 buttons .
A LED is also present , its operation is configurable. In the default mode, it turns red after a short time if the control command has not been received. Bidirectionality of Z-wave protocol is interesting ! LED is barely visible against sunlight ; tolerable for the red color , but the green is no longer visible at all ( acknowledgment of key press).
A CR2032 battery powers the unit. You will have to use the mini-screwdriver to open the remote and change it. I strongly urge you also to buy a suitable screwdriver to perform this task , otherwise you may damage quickly the small screw heads and no more being able to open it.
Mechanical and electronic design
Let’s have a look to the design of the key fob. The parts are those :
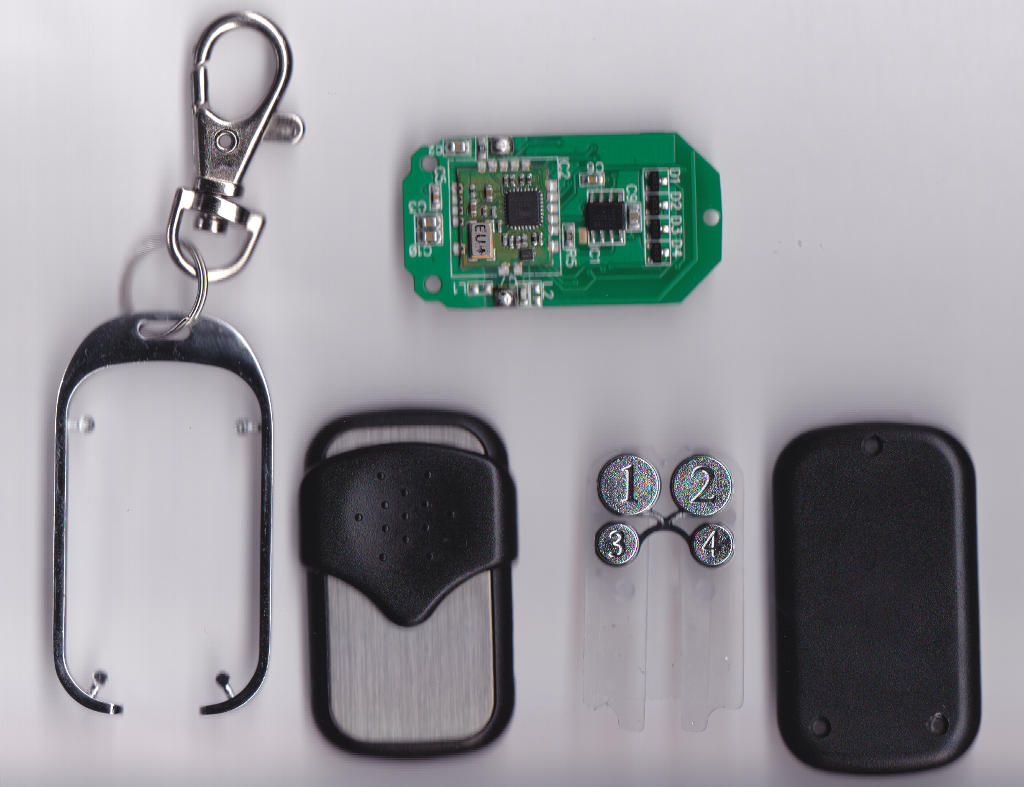
A dual plastic shell is surrounded by a metal ring . The ring is not completely round and 4 attachments to the shell are present. Indeed , four holes in the sides of the shell , hidden by the ring , limit somehow the housing sealing . Behind buttons, a plastic seal has been included and it is 4 micro-switches , which seem tight , which have been mounted . This is a good point because the reliability problems often come from there in this type of product. One would have imagined that this translucent plastic seal completely covers the top and also serve as a seal with the other shell for a perfect sealing.
The assembly is fixed by 3 screws, which does not creates any problem because of the ring fastening to the shell .
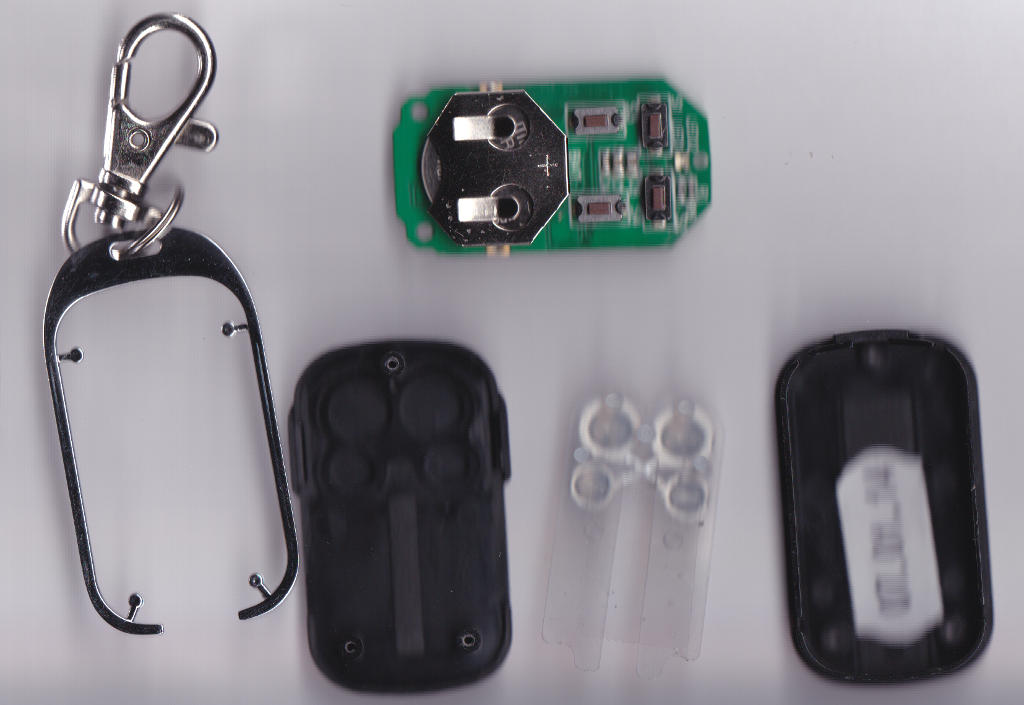
The battery holder seems robust but it is fixed by two solder points that contains the mechanical strength of the springs above , the negative contact is made directly with the PCB . I would doubt on the reliability of these two solders in the long term . Electronics is mainly available on the Z -wave daughter board directly soldered to the motherboard. The antenna is printed on the PCB , it starts from the right and goes up to the front.
I wish the designers conceive a total sealing of the module ( joint, removing holes, maybe 2 or 3 more screws ) and reach a standard level IP66 . It has happened to me to drop my keys in a puddle or let them in the rain.
Pairing and Configuration
Firstly please note that this remote can only operate in conjunction with a home automation box that controls your network, it does not have the ability to act as a primary or secondary master .
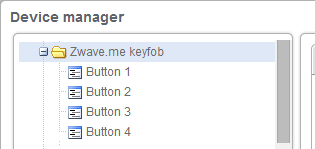
We are in the presence of 4 buttons and a LED . This simplifies pairing, no double or triple click to have it done : push the 4 buttons during 5 seconds, the LED flashes , and press the 1 button dedicated to activating the pairing or suppression from network . Other keys in this case have other functions described in the manual.
The version 2 fixes a bug of first version of KFOB regarding scenes : button 2 correctly call by default scene 2, button 3 for scene 3 . You may see in some other post this assignment : 1 / 2–>3 / 3–>2 / 4–>4, this is no longer true for version 2.
 I tried to get the closest as possible to the setup on this web page : declencher-des-scenes-avec-les-telecommandes-z_waveme-kfob.
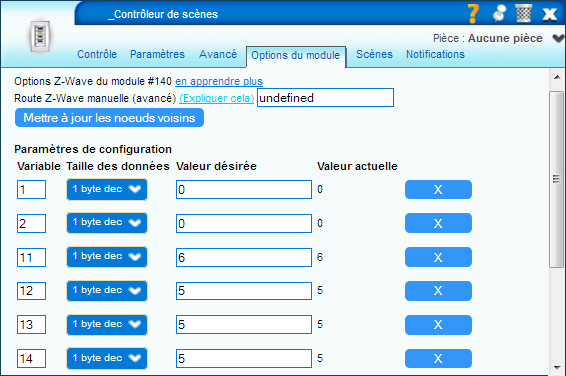
After a few hours of testing , it unfortunately appears that vera is buggy ( firmware 1.5.622 ) and mode 4 for buttons do not work ( configuration of the kfob through z -wave aborts). Therefore it means no way to use double click function buttons to call another scene . I kept the following setup :
- Variable 1 = 0: buttons 1 and 3 are individually assignable
- Variable 2 = 0: buttons 2 and 4 are individually assignable
- Variable 11 = 6: button 1 is in proximity control mode (single click ON and double click OFF)
- Variable 12 = 5: button 2 is the basic scene control mode ( scene number sent : 2)
- Variable 13 = 5: button 3 is the basic scene control mode ( scene number sent : 3)
- Variable 14 = 5: button 4 is the basic scene control mode ( scene number sent : 4)
You have then to add a trigger on the scene into Veralite , choose the remote control and scene number indicated and it will be called everytime you press the button.
Proximity control mode
This proximity control mode is interesting for two particular use case : my shutters will be automatized and won’t have any dedicated switch, there will be a central control done by automation and a tablet . This saves a few euros and avoid degrading the insulation of exterior walls. A Fibaro FGRM222 module will be directly mounted near the shutter. But what if the box automation fails, remaining in low light ? During house building also , how to control the shutters while the automation system is not yet in use ?
I simplify the description, but proximity control mode is sending a command like ALL ON / ALL OFF at a very low emission level that will be received only by the modules in the vicinity. So, in a perfect world I can handle the remote, get closer to one meter of the shutter, press the 1 button and the nearest shutter will open. I can do this for all shutter separately. This of course applies to any other type of control (lighting, motors, … ) .
First information, it works ! Although automation box is powered off, I can control receptor(s) nearby. The safety of my Z-wave network is not in danger, the pairing is necessary. If my KFOB is not paired to my network , I can’t control anything.
 Second information : defaut range of the control is too important, about 4 meters. If I’m in my living room and press the 1 button, I open the sutter , but also turn on the stairs light and heating . That’s too much !
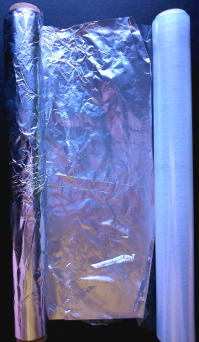
It is necessary to reduce the range which is quite easy : build a Faraday cage around the antenna : aluminum foil ( at the bottom of the bottom plastic shell ) , plastic film (above the aluminum to prevent short-circuits with electronics) and voila :
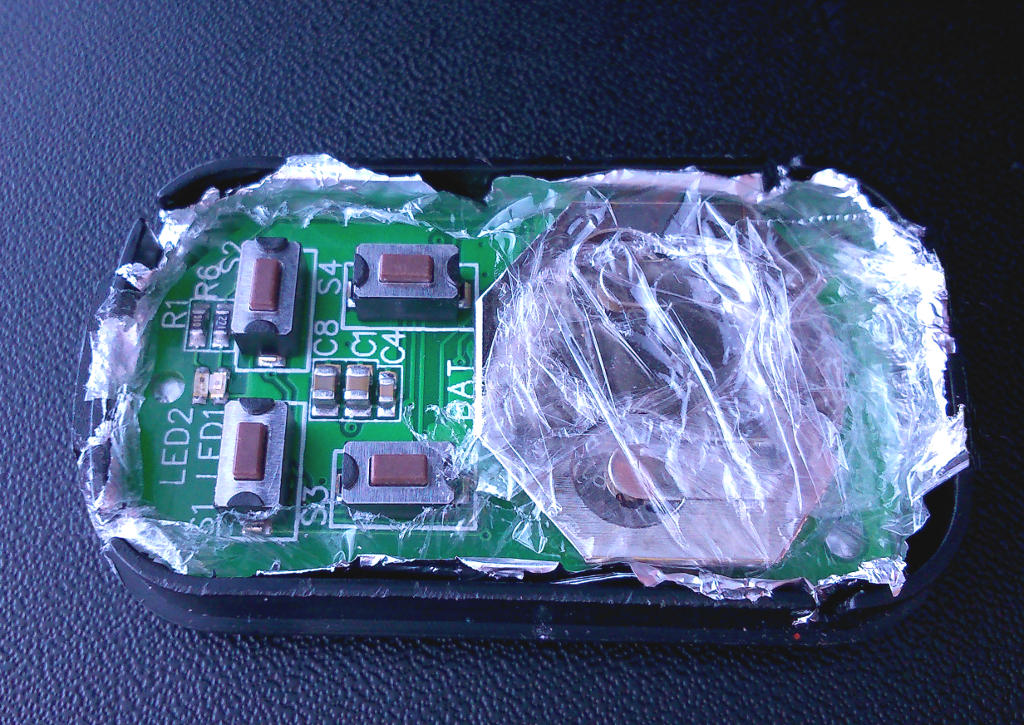
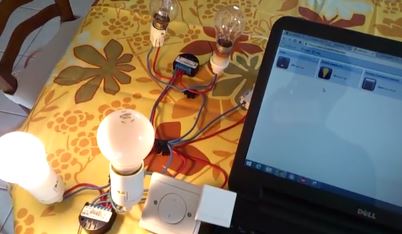
In this configuration, the range is about 1 meter, you can see the result in the video below, Fibaro FGS221 receiver being in the switch. The maximum operating distance is in the range 80cm – 100cm :
The tests also show that the human body is a very good shielding for 868 MHz : if you move close enough to the switch, it is certain that only this switch is controlled. Now on, if a second module is located just near the first one or behind the wall in another room, it will be difficult to control a single module.
Of course, don’t do this modification if you don’t feel you are able to do it. Your life is not in danger, but the life of KFOB is. In particular it is very easy to bypass the positive pole of the battery with the ground of the board thereby reducing battery lifetime to a few seconds. Furthermore, in the proximity control mode range is reduced, then it is also in the normal mode, this range being reduced to about the third of normal range.
Compatibility with Fibaro modules
I tested the proximity control mode with two kind of modules : dual light control (FGS221) and rolling shutter controller (FGRM222).
Apart from this mode, the KFOB also has the necessary functions to directly control module groups. But as the automation box is needed anyway, it seems logical to trigger scenes in the box.
FGS221 Module
This is the module that is controlled on the video above. But only the first output can be controlled, it is not possible to control the second one. So if you want to use this type of operation, let’s use a single module (FGS211).
Pressing the button turns on the light, double-click put it off.
FGRM222 Module
Here is a video showing the operating of the module with the KFOB in proximity control mode :
So everything is working perfectly:
- single press and the shutter is going up
- double press and the shutter is going down
- long press stops the shutter at the current position
Range of the remote
Indoor test
Range is more than ten meters with a concrete block wall and 3 thin internal walls between the box and the KFOB. Sending control command is also functional from second floor, having the box on first floor and floor made on concrete.
Outdoor test withour repeater
The box is located in a cabinet next to an exterior wall. I faced this wall. The control command is not possible if I walk away more than 4 meters from the wall. I’m about 5 meters from the automation box but with external concrete block wall and the different layers of insulation and finish.
This is largely insufficient to imagine controlling the house from the garden.
Outdoor test with repeater
The previous test wasn’t conclusive, I then have simulated a routing through a repeater module. I paired again the KFOB with Fibaro FGRM222 unit nearby. This creates a potential route that go through this module then acting as a repeater. I put this module out of the house with a direct link to the automation box through a window.
In this case I can easily walk away more than 10 meters from the house. The control is active as soon as I can see the FGRM222 module that is outside.
If I locate myself so that an outside wall is between the KFOB and Fibaro module then control is no more possible.
Direct light of sight maximum range
The Fibaro FGRM222 module is located in a way I’m able to see him constantly. The maximum distance between it and the KFOB in this configuration is 30 meters.
To summarize about the range
It is possible to reach distances of about 30 meters if in direct light of sight with some device of the Z-wave network. As soon as an outside wall is present between the KFOB and all other modules, it is almost impossible to send a control command more than a few meters from the house. If you want to control your home remotely from outside you have to have modules that can act as a repeater to transmit it to the box. I think that shutters modules inside the shutter tunnels are ideally placed to make the link between indoor and outdoor.
The KFOB must be paired with the network at the most useful/critical zone of your facility so that the box automation and KFOB can find a path using repeaters in this area.
Battery lifetime
I have never had the first version of KFOB so I can’t tell if the battery lifetime improves with the second version.
When I received the remote control, the battery level was 85%. A full day of tests have decreased it to 58%, then 27% down. I think that this full test day is at least equivalent to 1 full month of normal use. If using the Kfob around 10 times a day, I think we can reach a battery lifetime of 4 to 6 months.
Your feedback is important now. Feel free to leave a comment.
Conclusion
The design of this KFOB is very friendly. The integrated functions are convenient if you have an home automation box acting as primary master. The battery lifetime seems pretty decent.
Proximity control mode range by default is too important to control a single unit, a modification can reduce this range, meaning that it will become a dedicated KFOB for such usecase.
Control from outdoor with correct range is possible if the Z-Wave mesh network have modules that can act as a repeater between outdoor and the automation box. Without that it can be largely insufficient.
Au passage, bel article, merci !
Quelqu’un sait si cette télécommande fonctionne avec la Home Center Lite de Fibaro ? Si oui, possible d’associer des scènes ou activation / arrêt de l’alarme ? Merci !