
Test of wall switches 05443 and 05460 from Düwi / Z-wave.me
 Introduction
Here is a type of wireless switch that can be very useful, since it can be installed on a wall (or elsewhere) by gluing or screwing it. It can act as secondary switch near a bed, or in addition in a room with insufficient number of switches.
Why two products and two brands? Firstly you should know that they are originally Duwi products whose firmware have been updated by Z-wave.me. We can therefore find these two references under a brand or another. I also wanted to have the two types of available finishing for this switch, which was possible thanks to my partner Domadoo. The aesthetics of a wall switch is also a selection criteria. From a functional point of view both switches are identical. From a mechanical point of view they are very near even if the parts are not interchangeable.
Package content
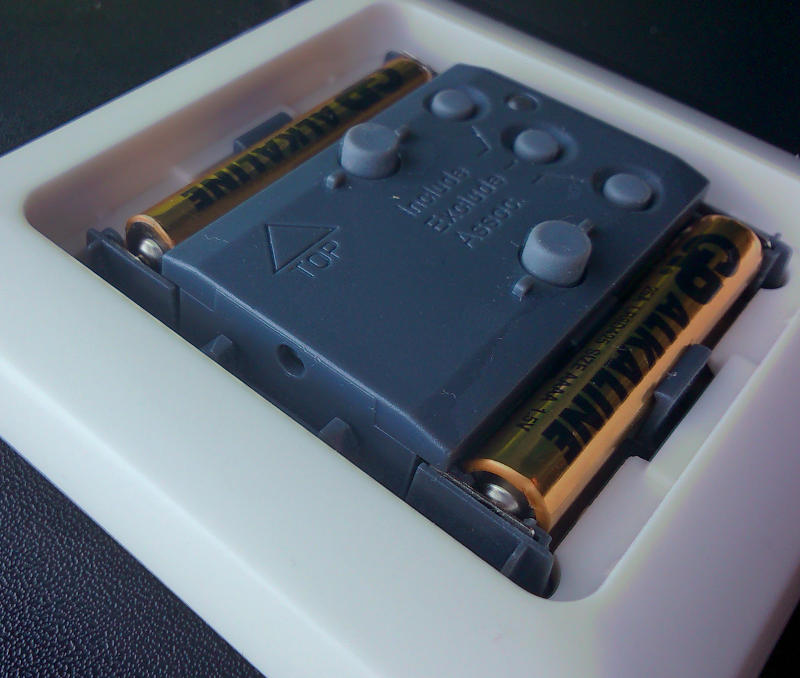
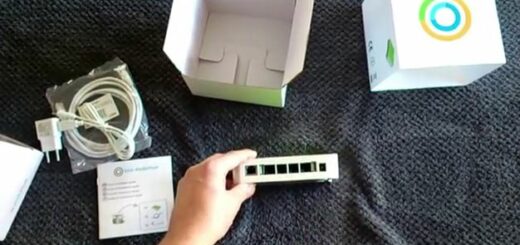
The package contains those parts :
- the base containing the electronic part
- the trim
- the rocking pusher
- 2 AAAA batteries. It is not a mistake (4 x A), they are slightly smaller than the AAA batteries that we know well.
- User manual. The one I received is dedicated to Z-wave.me 06443 product (packaging problem ?). The set of instructions is not fully compliant to the product way of working and doesn’t cover fully inclusion of the module into an existing Z-wave network. If you are in the same situation than me, search for information that is available on Internet (Domadoo blog, domotique-store tutorial, this blog …).
The different part are clipping eachother very easily. Put the batteries and configure the module before closing it (see explanation below …)
I wanted to test the Z-wave.me 05443 in three situations:
- As a scene controller for my Veralite controller
- As a scene controller for my eedomus controller
- In direct association with a Fibaro FGS221 module to control light
Using the device with veralite
Inclusion and configuration with veralite

I had some problems to include the switch in the z -wave network and have its configuration done :
- the user manual is describing inclusion in z-wave network too shortly and instructions are not the correct one
- the button labels does not match the features of inclusion / exclusion when network is managed by another controller
- there are different tutorials on the net , some useful with my unit , some not working.
Here is the method I used for inclusion:
- Press 2 seconds Inclusion button, the LED remains lit
- Enable inclusion function on the home automation box that should detect the presence of the device, the LED turns off
- Repeat the following sequence until the end of the module configuration by the controller : press briefly three times the down button , wait 1/3 second, then repeat . The LED should remain constantly lit green . This sequence allows the module to stay awake so it can receive configuration frames.
Let’s talk about the exclusion of the module network . I was able to exclude the module by performing the same procedure as the inclusion. The button named exclusion on the module has no effect when used with an existing Z-wave network.
Although the scene controller mode was not working, we can focus on the settings to do association with the module(s) .
Test with veralite
Unfortunately I have not been able to have a functional setup for scene controlling. Even by reusing various settings described on tutorials , even making several exclusions / inclusions , even resetting the module or removing the batteries , nothing have enabled fully the scene control mode on my Veralite with firmware version 1.5 .622 . This firmware version of veralite is not compatible with these modules.
Using the device with eedomus
Inclusion and configuration with eedomus controller
 Inclusion and exclusion have been much more easier with this controller, simply thanks to documented procedure included to eedomus online documentation, then please refer to this page in french. Major part of documentation is available in english, but not the full package 🙁
In my case I had to reset the Z-wave.me device before including it in the network. The reset is also described in previous page.
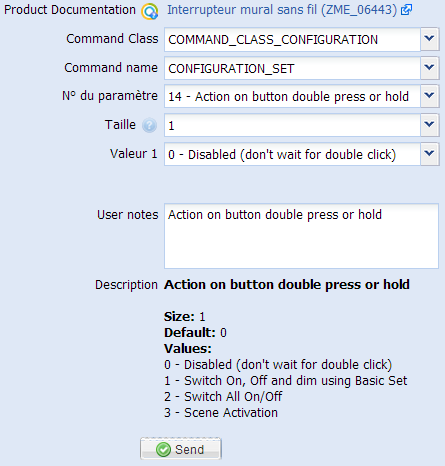
The switch is already working as scene controller after (reset and) inclusion. If difficulties, parameter no 13 has to be set to 3 to fix behaviour of single clic as is described in user manual. The parameters and configuration are also described in configuration panel of eedomus controller, great !
I propose also to deactivate double clic and long press by setting the parameter no 14 to 0 (see screenshot at the right).
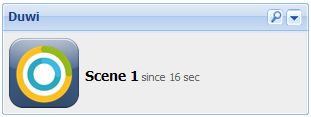
Tests with eedomus
The switch is fully working as expected and is sending scene messages. The behaviour is aligned with the documentation of the product : call of scene 1 with top button, scene 2 with bottom button, double clic, long press, etc …
I propose not to use double clic and long press to launch scenes, reason why I have indicated the corresponding configuration. Double clic timing is critical, also long press is correctly working if clicking just before and also after, etc… As far as those pushing modes are interesting to dim lights, this is quite difficult to use it correctly to launch specific scenes.
Regarding latency with eedomus controller in scene control mode, it is around 1,5 seconds between the push of the switch and a light switching on. In this case, you should use the association mode to have the latency to become indistinguishable.
Using the switch in association mode
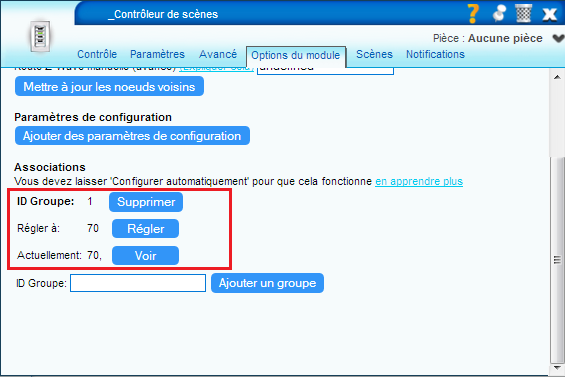
Configuration of association mode
This association can be accomplished using combinations of keys on the two modules . I prefer using the z-wave controller to configure it. A single control group (group 1 ) is active on the Z- wave.me switch, so you have to simply add the modules number you want to control in this group :
Tests in association
This mode is fully functional , with very low latency . In this use case the required transmission distance is relatively short, the switch is located in either the same room or in an adjacent room. I never had to challenge the RF range of the unit under these conditions even if a concrete wall stands between the switch and receiver.
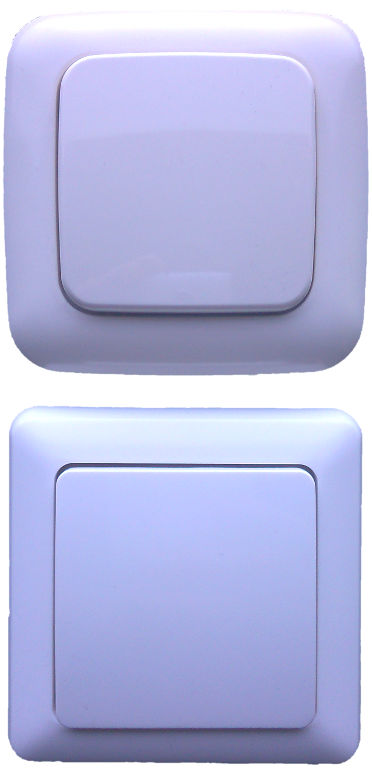
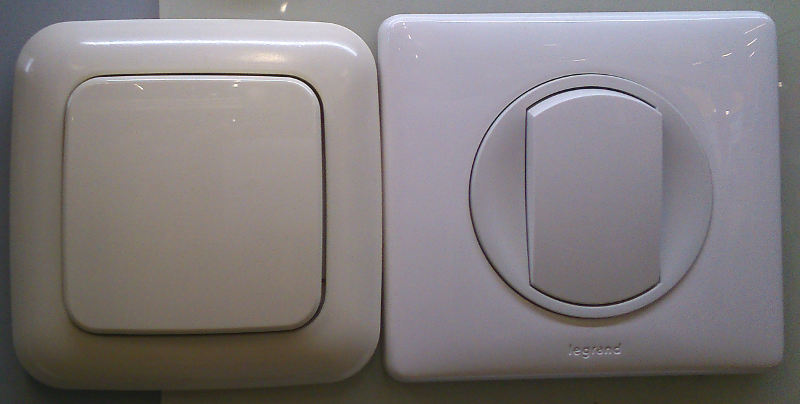
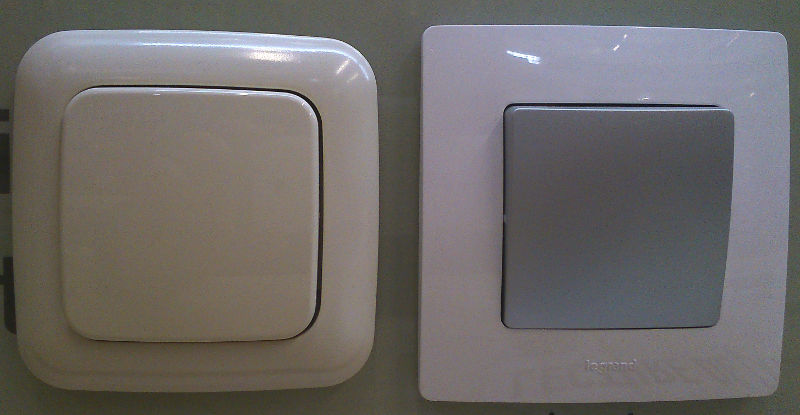
Aesthetics
Visually speaking, the finishing quality is very good with shiny plastic , soil-repellent and scratch resistant. The exterior finish is better than wireless switches we can buy in DIY stores (DIO, Chacon and others), they can be compared to products of major brands in electrical equipment. Those products have been designed to match visually with those products :
- the 05443 model integrates with Duwi Everlux range in white color
- the 05460 model integrates with Busch-Jaeger Duro 2000 range in cream color
We can not say that those products range are common in France. Can those products therefore be aesthetically close to products you can find in our country? Look at those pictures :
| Mosaïc | Céliane | Niloé | Kalya | |
| Modèle 05443 (Everlux) | 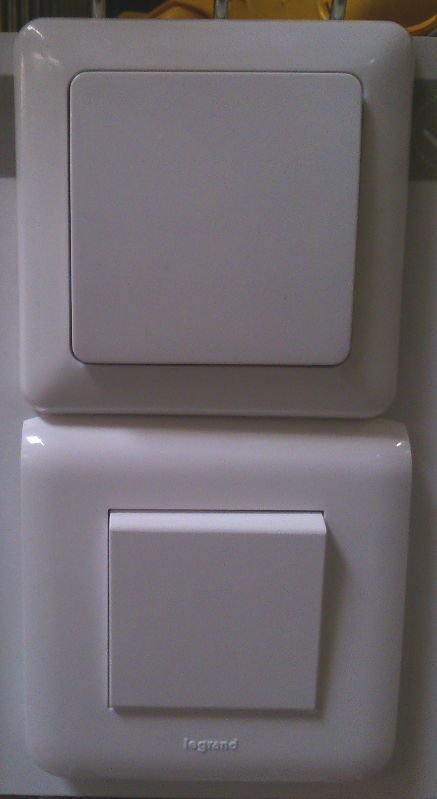 |
 |
 |
 |
| Modèle 05460 (Duro) | 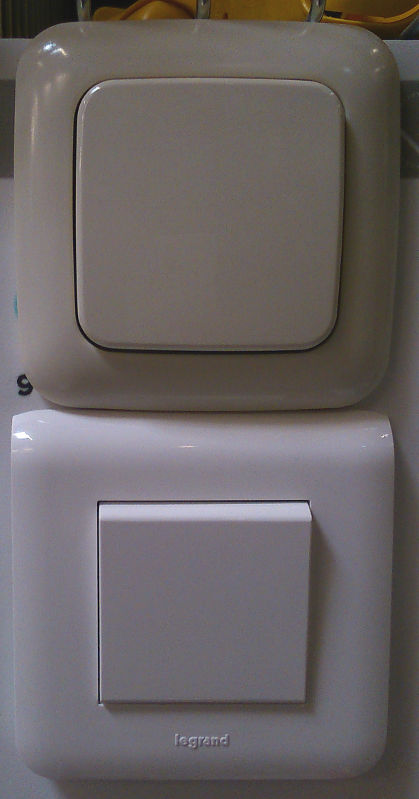 |
 |
 |
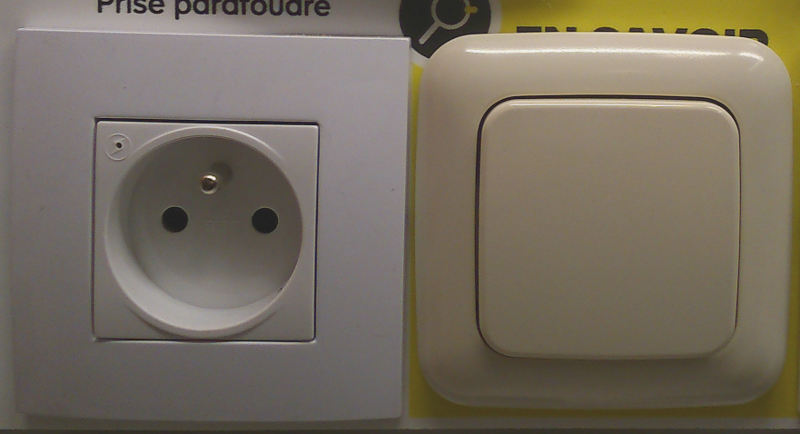 |
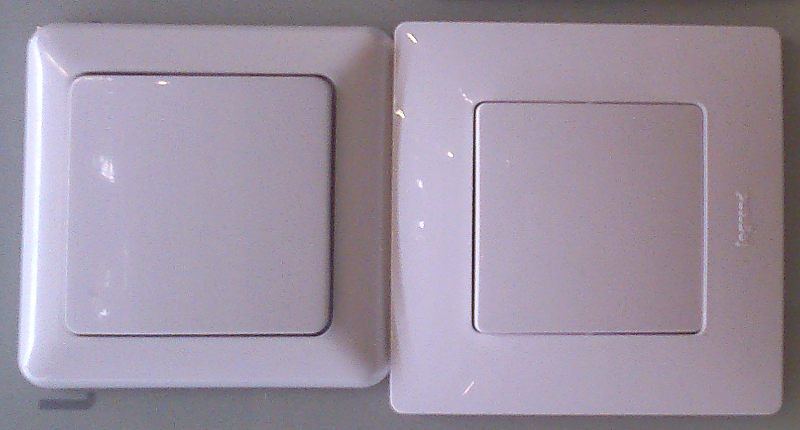
It’s not possible to find a range of standard electrical equipment that matches well with the style of Z-wave.me switches : different shape, slightly different external size, different color. The white colour of Z-wave.me is not equivalent to white products of other brands that we could describe then as whiter than white. The shape and color of the model Everlux (05443) is however traditional enough to be almost unnoticable against other switch designs.
It’s not the same case for Duro model which is noticeable due to its beige / ivory color and its rounded shape. Difficult not to see it, impossible to have it matching the rest of the electrical equipment.
Electronic & mechanical design
Here are the different parts of the Z-wave.me switch :
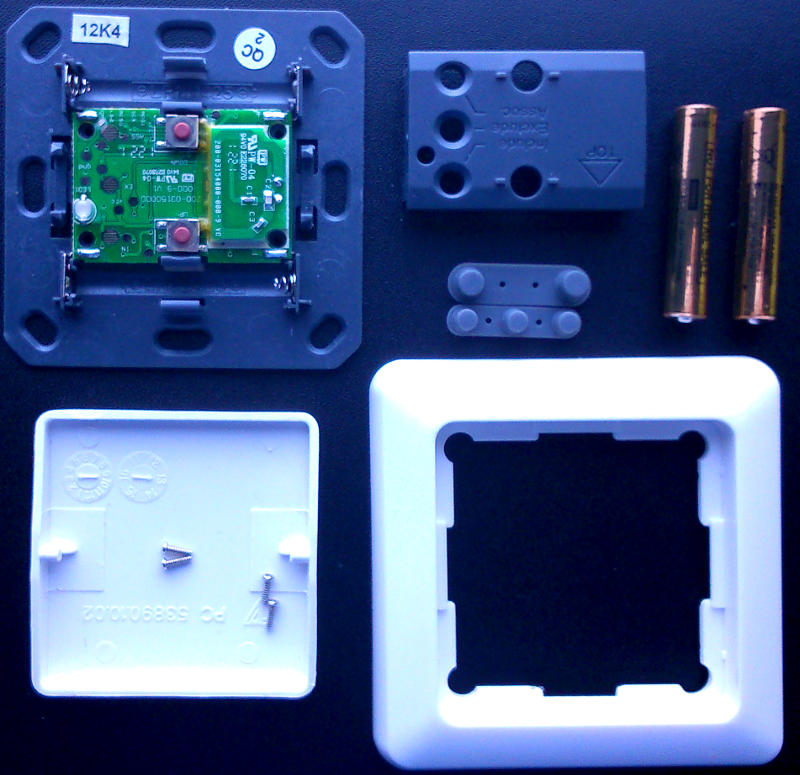
Microswitches are present for the main switches and also three carbon contact buttons for configuration. A bicolor LED serves as user feedback.
AAAA batteries are securely fastened and connected by a honest spring system , and the assembly is properly closed with a cover screwed with 4 small screws in the back.
 The rocker is fastened to the cover housing by two pins serving as pivot. I wanted to know the reason of mechanical problems described in this video showing a Düwi model that seems to have the same tilting part. You can see through the comments about this video that the tilting part was removed several times , which can cause wear on those pins . I confirm you have to apply quite a strong effort to remove it, then it is understandable that those pins can wear out or break over time. The problem in the case of Z-wave products is that access to batteries and configuration buttons should normally be done by removing the tilting part … I myself have chosen to open it rather by removing the 4 rear screws with the corresponding screwdriver, but this can only be done if it is still possible to remove the switch from the wall. When refitting the screws , make sure that the tightening is not too strong, otherwise switches may not work as well as it should.
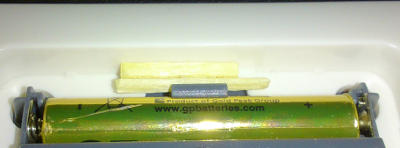 Last little complaint about mechanics of model 05443 (less pronounced on the 05460 ), is that the tilting part can have a pretty important movement , I suppose to allow to grip it on the back in order to remove it. The triggering itself of the microswitch is obtained with a small movement. The overall impression is then of a very soft and not precise part. It may also arm the small plastic pins when applying strong pressure. In my side, I put parts of matches behind the tilting part that serve as a wedge, and I prefer the feeling in that situation.
I would like to close the section with a positive note. This is not a discounted product. The overall design is good as are the plastics. My opinion is that it should enable a very good product lifetime without functional or visual degradation.
Battery lifetime
The AAAA battery level have dropped from 100% to 94% during the test period. When doing around 100 switch ON/OFF the battery have decreased by 2%. After those tests and the comments you can read below it appears that the battery lifetime is around 1year.
The batteries can be easily bought on the internet or in specialized stores for a reasonable price, 1.45€ each one for instance.
Conclusion
Firstly, forget this Zwave.me switch if you have a veralite. This controller has a bug which prevent to use it correctly. I would recommend this Z-wave switch, I have to say that the choice is very limited for this type of product with Z-wave technology.
The quality is good as is the visual aspect, but the design is very different compared to electrical equipment we have in our houses. However, the 05443 model has a sufficiently neutral aesthetic not to notice him. Battery life is correct . Fortunately, because we have to prevent us to remove the tilting cover too frequently otherwise it may be damaged. Take precautions : keep the cover removed until the switch is installed and configured, then remove it only when necessary ( battery change).
An effort should have been made also on the user manual to describe all functions of the device and fully match the way of using it.
Update 2014-05-01 : Test with eedomus controller, post revamping
Update 2014-04-13 : Battery lifetime updated thanks to a comment about it
I have been trying to get the 05443 working with Vera Lite since the dawn of time and never succeeded. Vera sees it during inclusion, but won’t communicate with it. No battery level reported. Likewise the switch itself is anti-social and says it’s not programmed afterwards. Anyone any clue?
This is a long time since my test have been done and I’ve never succeeded to have it working with veralite as mentioned in the post.
Although in the meantime it worked with another controller so I suspected a bug in vera lite firmware.
Which version do you have ?
Une source pour les piles AAAA : certaines piles 9V (je vous laisse chercher lesquelles).
Apparemment, sur ce blog ils ont réussi à utiliser l’interrupteur en tant que contrôleur de scène :
http://wiki.zwaveeurope.com/index.php?title=Use_ZME_06443_as_Scene_Controller_in_VERA
Bonsoir. C’est peut être dû à ma box domotique. J’espère pouvoir confirmer bientôt.
C’est confirmé, il s’agit bien d’une problème avec la veralite. L’interrupteur fonctionne parfaitement avec la box eedomus, voir la mise à jour de l’article…
Bonsoir, installé pour gérer la lumière dans ma chambre les piles auront duré juste un an.
Merci pour l’info ! Je vais modifier, pas le temps d’attendre 1 an de mon côté 😉
Quelle est ta configuration ? Une box domotique ? La box est-elle éloignée ? L’interrupteur sert-il souvent ?